
SEBASTIAN DIRR | bow winding machine
Description
Professional violin bow winding machine fixing the laping on bow stick by Sebastian Dirr a Violin maker master in Erlangen. SEBASTIAN DIRR
A home-made device for bow winding / Fixing the lapping on a bow stick using a novel methodBy
- Sebastian Dirr Bow maker based in Erlangen, Germany
- For more informations, please see the product datasheed.
- We have got this machine in stock. For shipping terms, please feel free to ask.
Ishare my workshop and tools with another bow maker – my 24-year-old son Julian. When he left for two months to work with a luthier in Thailand, I sent him on his way with an indispensable little helper: the clamping tool that we use for winding the lapping wire on to bows. To find a substitute for this tool I contacted a number of colleagues, but no one had a suitable device to spare. Many luthiers and bow makers wind the lapping on without clamping the bow at all. Not only is this very tedious and time-consuming, it is also quite difficult to interrupt the winding process and come back to it. Some bow makers use wooden clamping contraptions that have been passed down to them from previous generations. But because of the long periods of use (as well as disuse) that these wooden devices have been subjected to, they tend to become imprecise. Also, there are no spare parts available for fixing them when they break down. Another approach is to assemble a temporary contraption, for example using an electric drill to rotate the bow. The problem with this is that it’s very easy to damage the bow. Of all the luthiers and bow makers that I’ve talked to, hardly any of them has a clamping system that they’re entirely happy with. As a result I started thinking about developing my own clamping tool – one that would solve all of these issues.
1
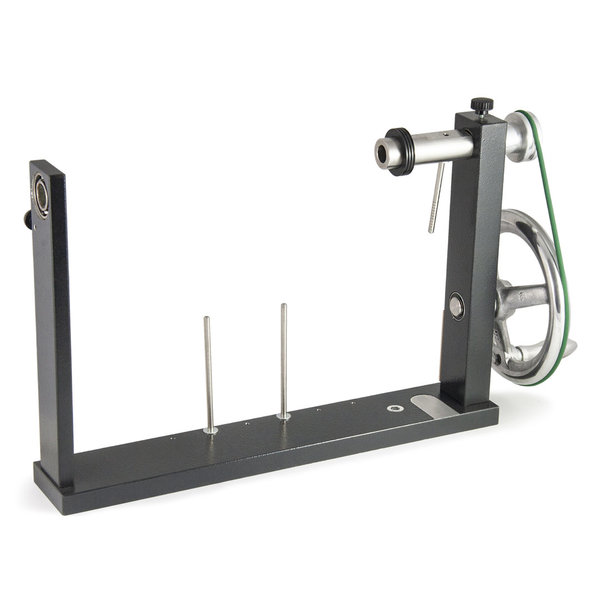
I absolutely love old tools and devices made of wood, but with this bow winder I decided to use metal instead. It is made from the following parts:
base and sides of an aluminium frame with wrinkle paint coatingstainless steel clamp with a plastic washermanual crank wheel made from aluminium, with an ‘O’ belt made of rubberball bearings for all of the rotating parts The bow winder weighs 2.6kg and its dimensions are 600 x 340 x 80mm. I thought it important to make the winder robust and resistant to environmental factors such as heat and humidity. There is only one part that will wear down: the rubber sleeve on the inside of the clamp – and this can easily be replaced anywhere in the world.
2
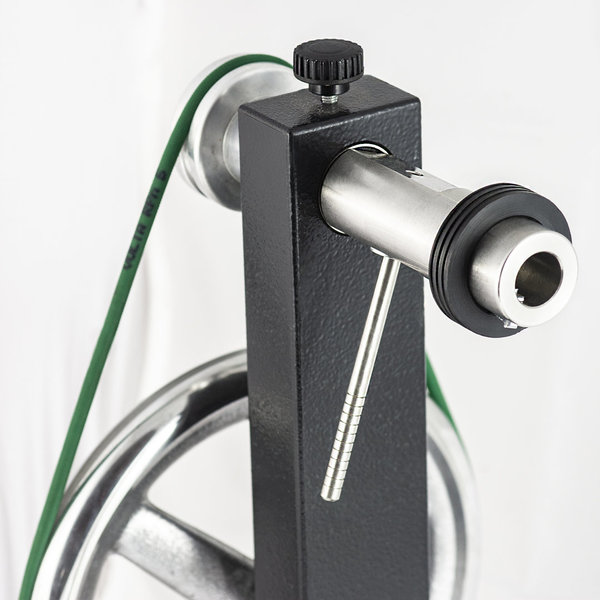
To install the bow in the winder, I place its end inside the clamp. A plastic washer on the outside gives the necessary clamping tension, while the inside has a rubber sleeve to protect the bow against any damage. It took me a while to find exactly the right type of rubber sleeve: garden hoses and gas hoses have proven to be the most reliable, and there are multiple sizes available to match different diameters. At the other end of my bow winder there is a ball bearing that effortlessly tracks the bow’s rotational movement. The ball bearing is lined with leather on the inside to avoid any scratching of the valuable bow. After I unclamp the bow I always check the finish on it. With my previous clamping tool I often had to retouch the clamping spots, but this new device holds the bow so gently that it never becomes an issue.
3
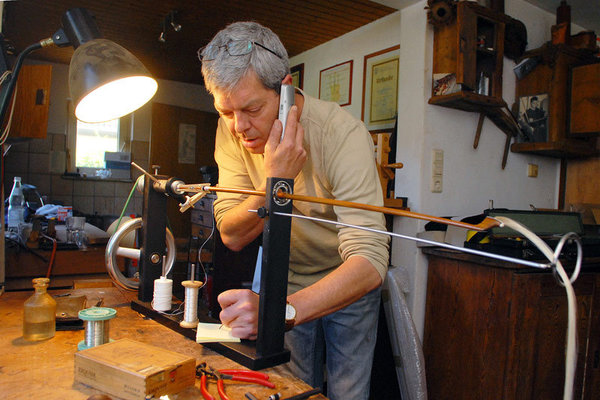
completing the winding shown in the right photo used to take me around fifteen minutes; with the new bow winder, this has come down to just three minutes. My muscles and wrists always stay loose and relaxed, even after I’ve done a large number of repairs.
4
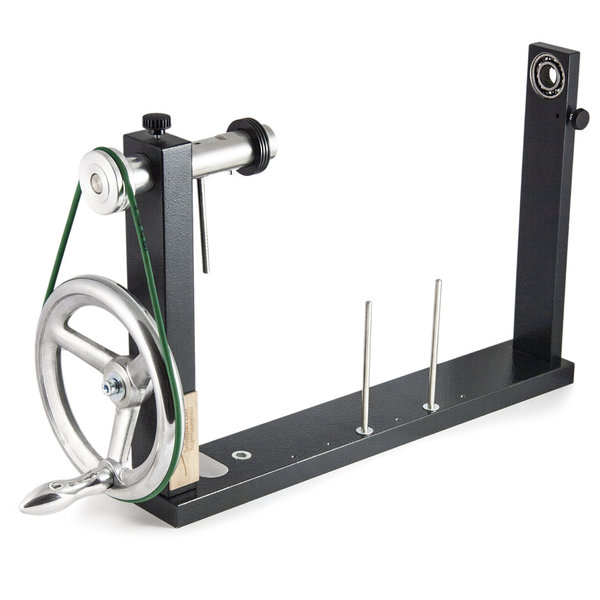
For lappings with two-colour windings, it’s proven very useful to have a holder for a second spool. I can easily keep the black thread in hand (shown above left) without its spool unwinding while the bow is rotating. This is because the spool is temporarily parked on an extension bar coming off the clamp. When I want to include the black thread in the lapping again, I simply return the spool to its holder on the base of the device.
5
When the phone or the doorbell rings, there’s no need for foul language in our workshop any more. If I ever need to interrupt the winding procedure, I take my right hand off the crank wheel and fasten the clamp using a screw on the winder’s frame. The wire or thread remains fully tensioned while I’m away.
6
I’ve attached the bow winding device to my workbench using a simple vice. A section of the wrinkle paint finish on the base of the winder has been polished smooth just for this purpose. However, it’s also possible to recess the device into the workbench. In this case, it is fastened using a mount on the bottom. This mount can be quickly loosened and fastened using a hex key so that the winder can be freely rotated – which may be necessary in order to steer clear of the bow’s hair and frog during winding.